All the data science enthusiasts must be aware of Anaconda Navigator which is one of the most useful tools for data science projects as it comes up with all the useful packages.
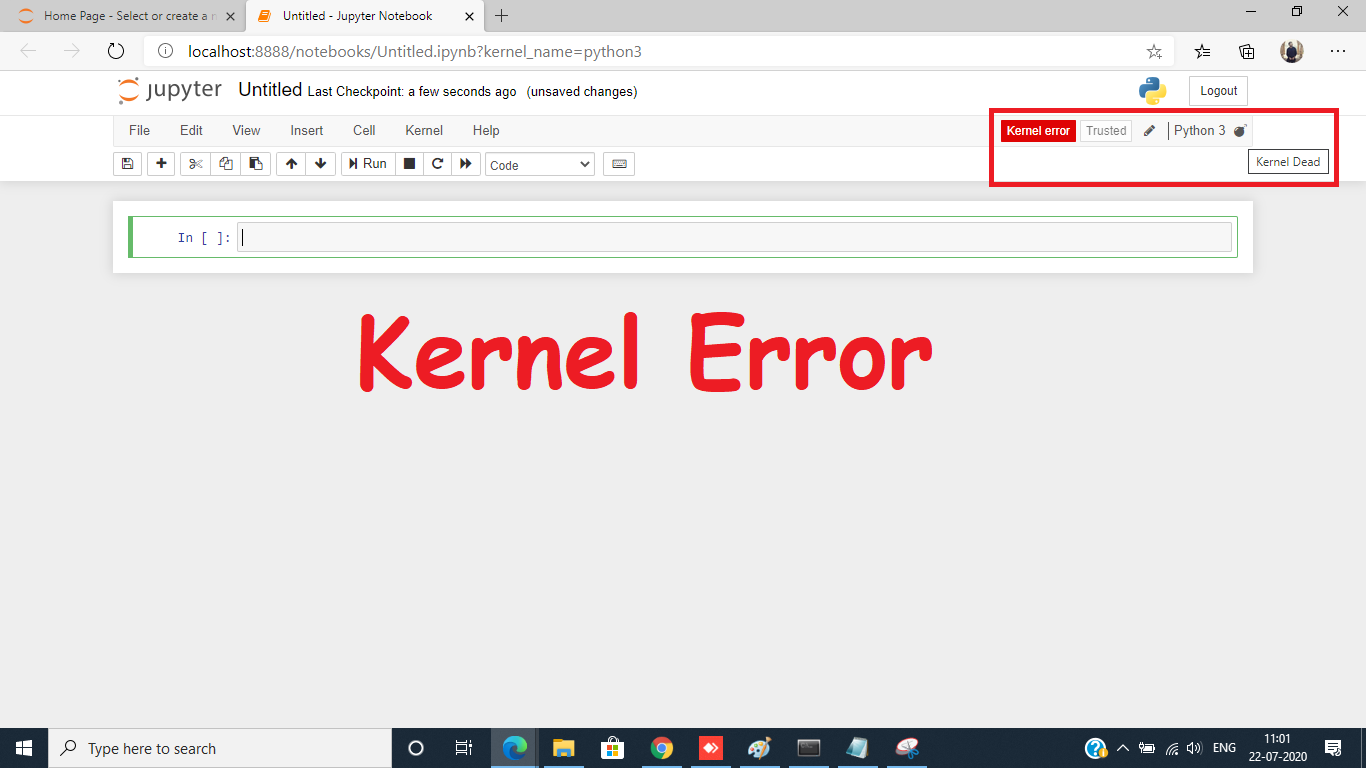
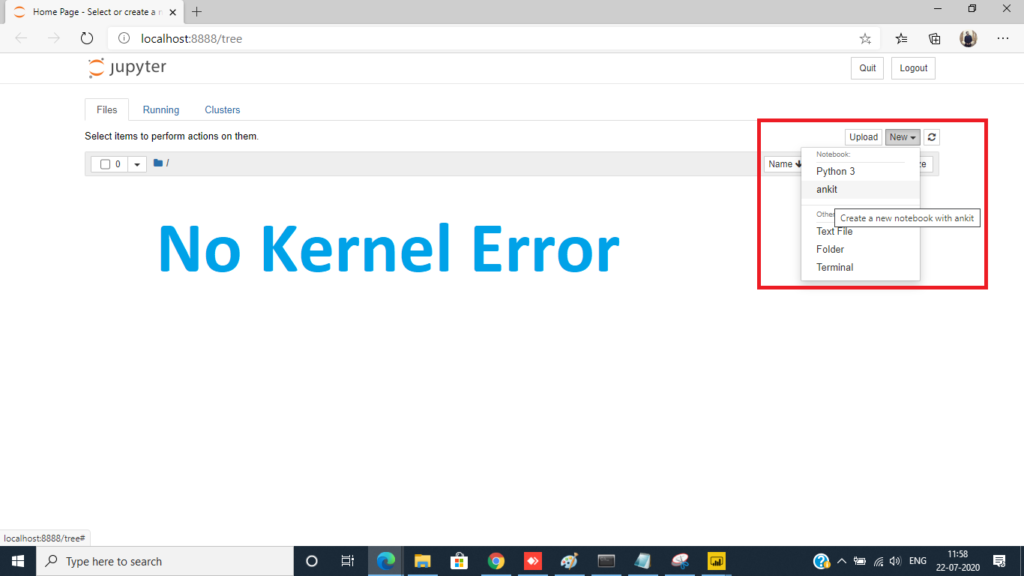
I recently started using it again and after installing it when I opened a Python 3 file, I saw a red box with Kernel Error written in it. I googled for a solution and realized that I have not set the virtual environment for it.

Now that I have solved this issue, following the tradition of this blog page, I am sharing the solution – “how to get rid of this kernel error”. So let’s get started.
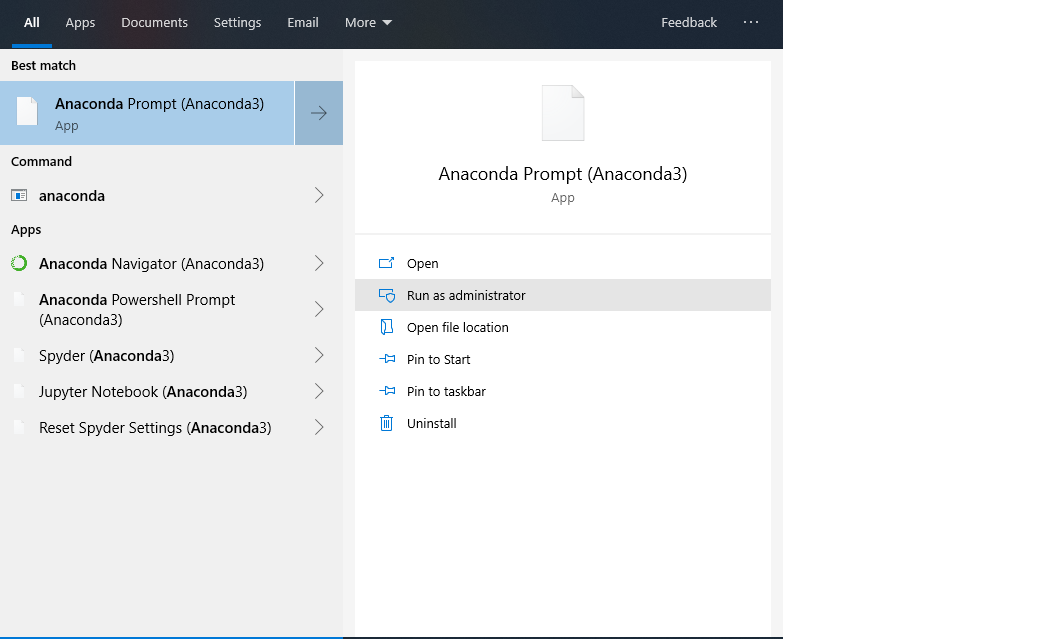
First of all, you need to open the Anaconda Prompt, which is a terminal that gives you to access the back-end of this tool. To open this, go to the search bar and type Anaconda Prompt and run it as Administrator.
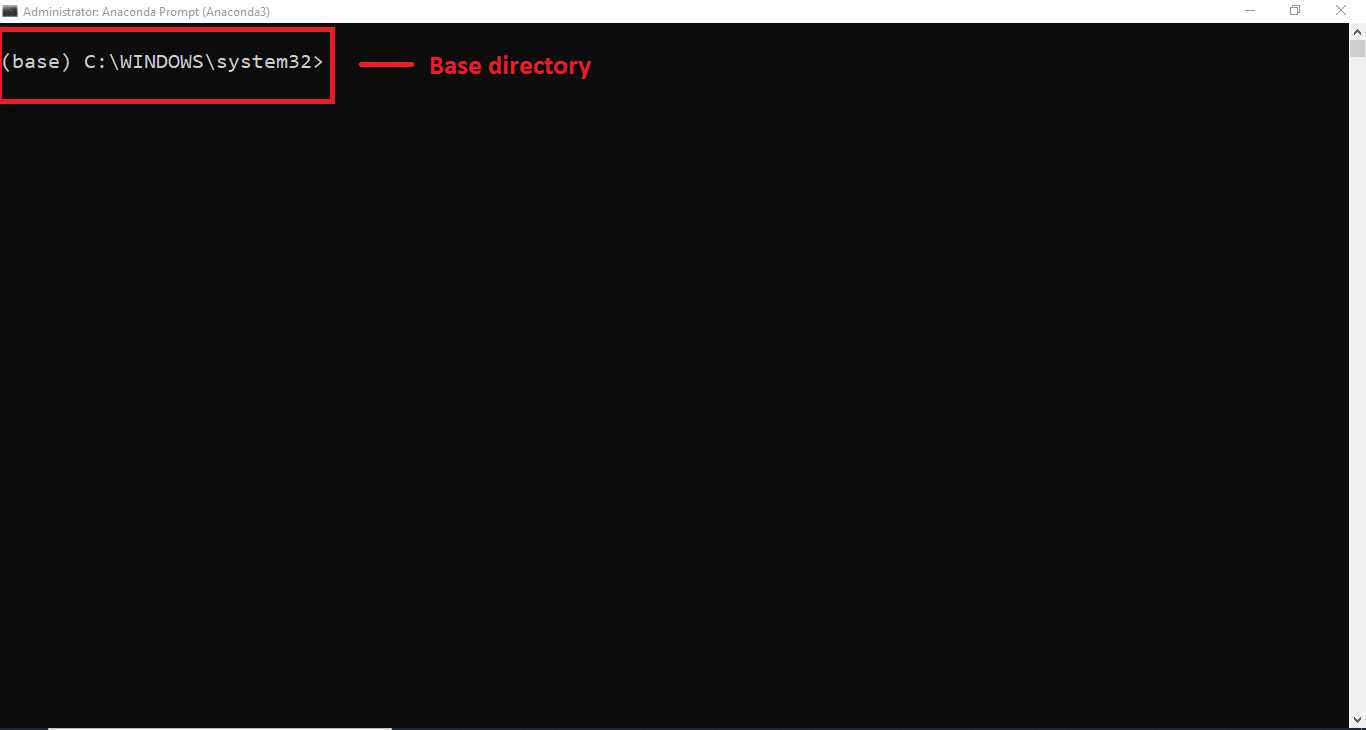
A black screen will appear with the location of the base directory on it. Here (base) is the base environment and c:\WINDOWS\system32 is the base directory.
We have to switch to the desired directory where we want to do our development. I use my E: drive for development, you choose according to your convenience. I have created a new folder named Data Science and within that is a machine folder. I will be using this path to install my kernel and further development.

If you will type jupyter notebook on the terminal and run it then you will not find any environment except Python 3 and if you open a python 3 file you will get the kernel error.

So exit from the front end. Press CTRL + C in your Anaconda Prompt to exit. Now we will create our virtual environment and to create that use the below code.
conda create -n <your environment name>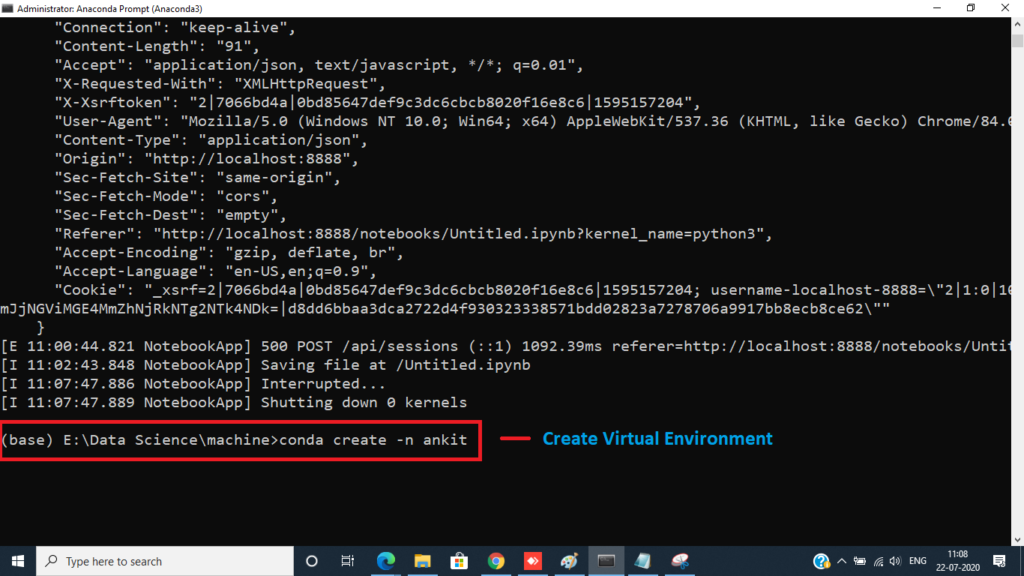
After creating, activate it with the below mentioned code.
conda activate <your environment name>You will notice that after activating, the environment changes from (base) to (ankit).
Next, we have to install the kernel [ipykernel]. Install it using the conda command mentioned below.
conda install ipykernel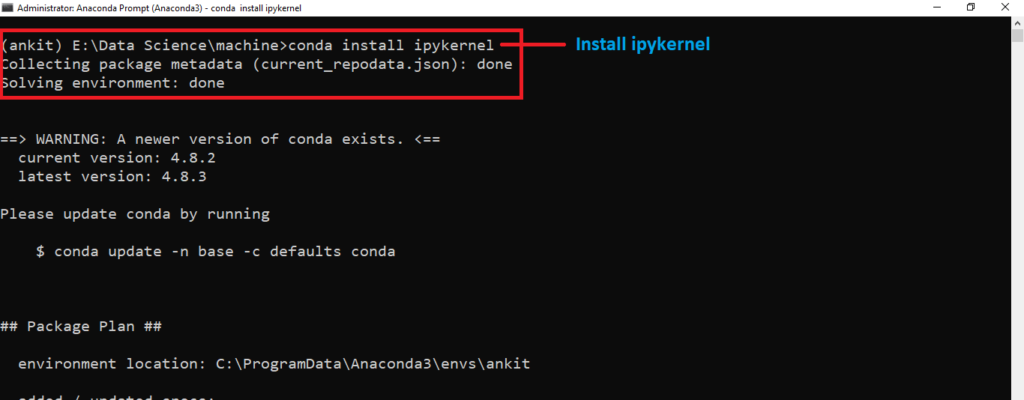
It will take a few minutes to download and install ipykernel and its dependencies. Once it is done the only thing left is to add this kernel with our virtual environment.
python -m ipykernel install --user --name myenv --display-name "<your environment name>"
We are done with all the processes and you can install the libraries you want in this environment by using the conda command. Some of them are shown below.
conda install numpy
conda install pandas
conda install matplotlib
Now when you will open the jupyter notebook, you will find your environment name there and you can use it to write your coding or data science projects.
If you find this post helpful then LIKE it and FOLLOW my blog.
Will post more such interesting and helpful content related to Business Intelligence and Data Science.
Thank you.
Excellent article, really helpful. Just one remark, please replace –dispaly-name by
–display-name. Thanks!
Thank you Michael for appreciating the article. I am happy that it helped you. Share this with those who face this Kernel Error.
after doing all this . again facing the kernel error
great work. just followed the way you presented and my issue is resolved..!!
thanks a lot , it worked
For me, the No Kernel issue is with using R in jupyter notebook. Can you help in this regard? Many thanks.
Thank you so much! This article was extremely helpful to be able to have a virtual environment that works. I have a question though…
I recently uninstalled Anaconda and everything that came with it, following exactly its documentation. When I reinstalled it, that’s when I had this kernel error. What could I have possibly done wrong? Before uninstalling Anaconda, the “Python 3” option at Jupyter Notebook was working just fine.
Thanks!
And for R kernel? What would be the code line for adding R kernel to our virtual environment? I have it added to my jupyter lab but it’s not working and I think your solution would work for it too. Thank you!
Thanks!!!! So clear and effective. All the love of the world for you <3
Thank you so much for your appreciation.
It’s not work for me please help me
Hi, could you please let me know what error are you getting?
Thanks that is very helpful.
I have been looking for a solution for days, finally this worked!
Thank you very much! It solved my problem👌
Hi, i followed all the steps you showed in above steps but still the error is not fixed in my case. I am using Windows 11 Pro version. Can you please suggest me, how to get rid of this problem.